
Openwrt安装配置Tailscale教程
1. 软件安装
图形化工具: https://github.com/asvow/luci-app-tailscaleTailscale程序包:

推荐使用自编译固件或者软件仓库的方式按照
2. 验证绑定
2.1 启动服务
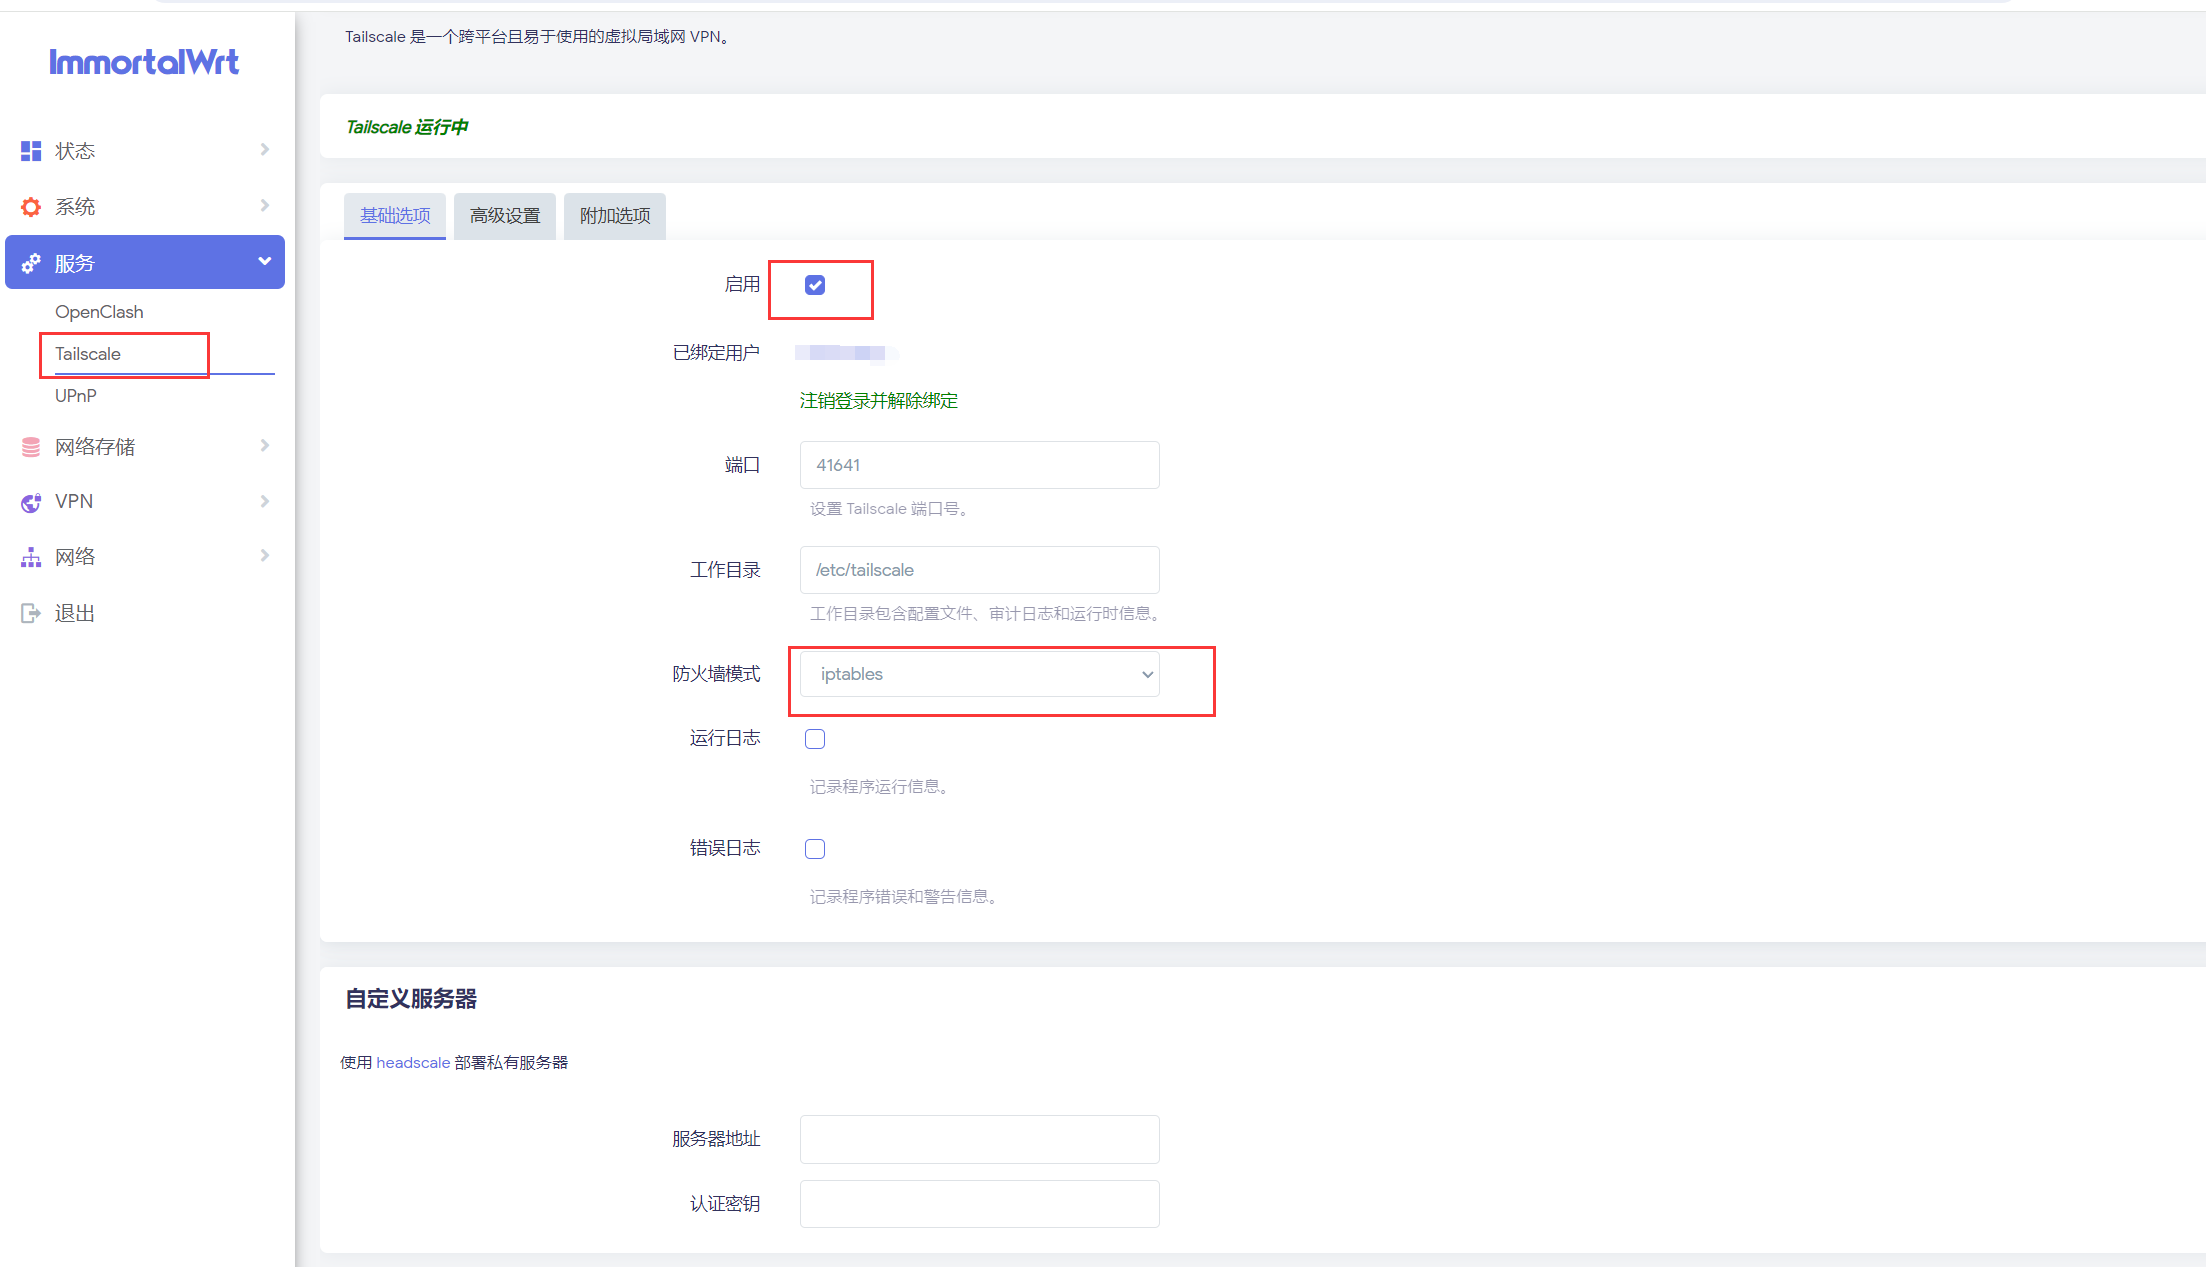

验证成功后

2.3 配置路由表
组网配置
输入以下命令回车,设置本设备为局域网出口,如果你的局域网不是192.168.43.X的网段,需要将命令中的192.168.1.0修改你的局域网实际的网段(假设你的openwrt的IP是10.10.10.222,填写10.10.10.0/2)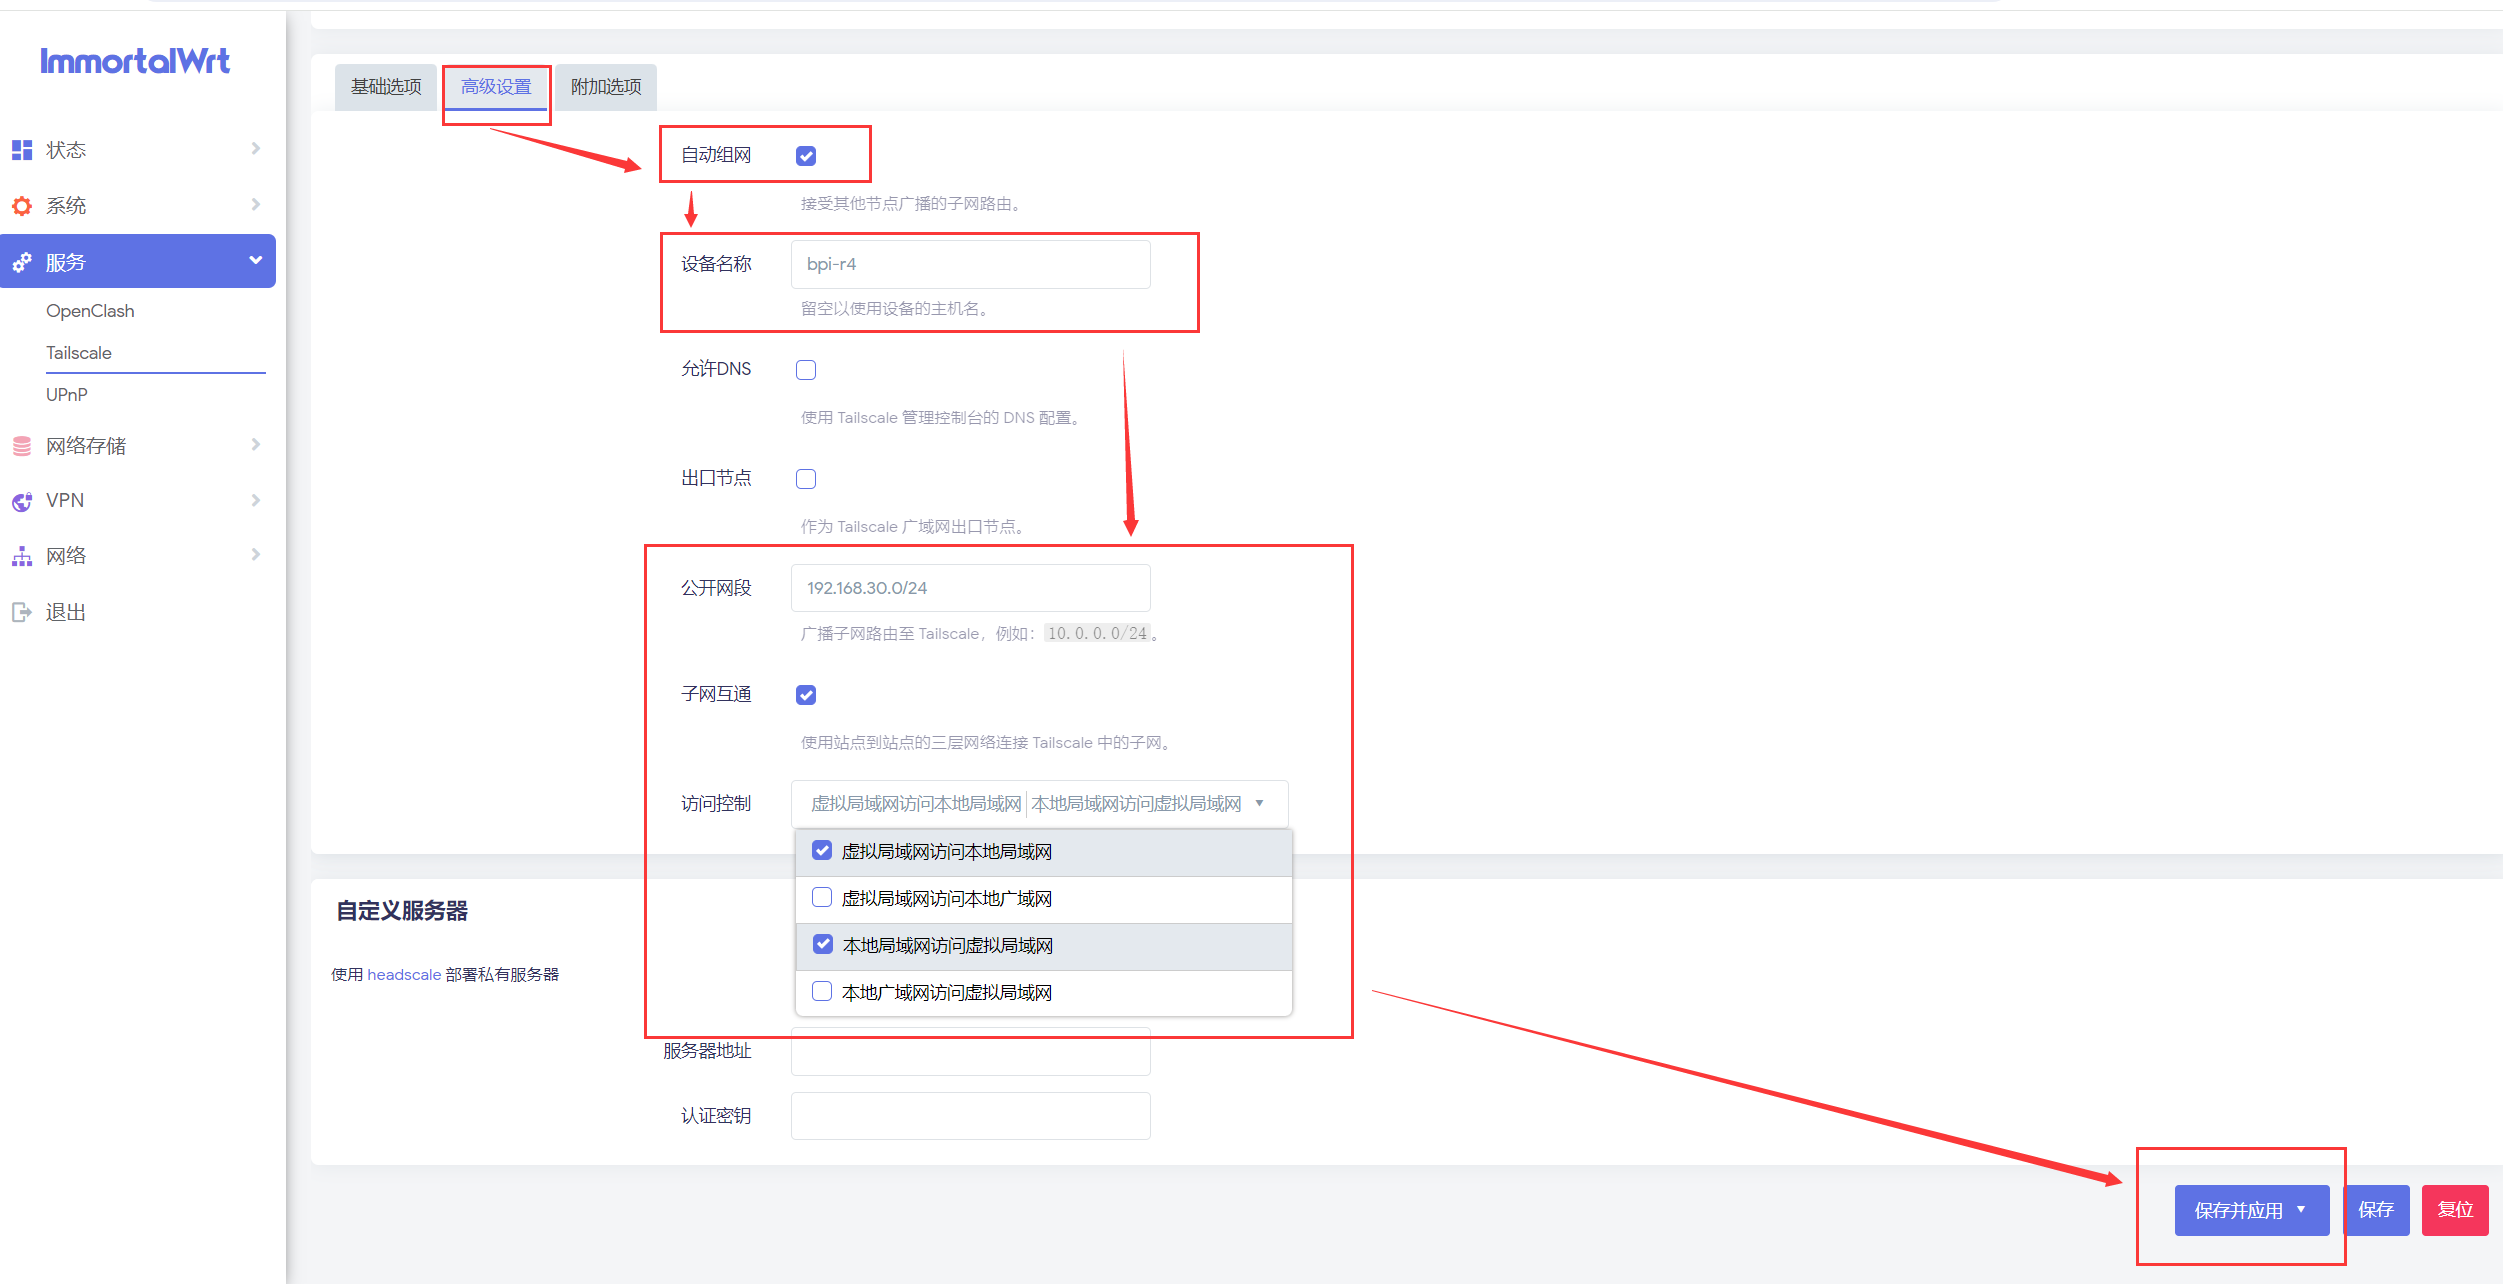
保存并应用
3. Tailscale控制台配置
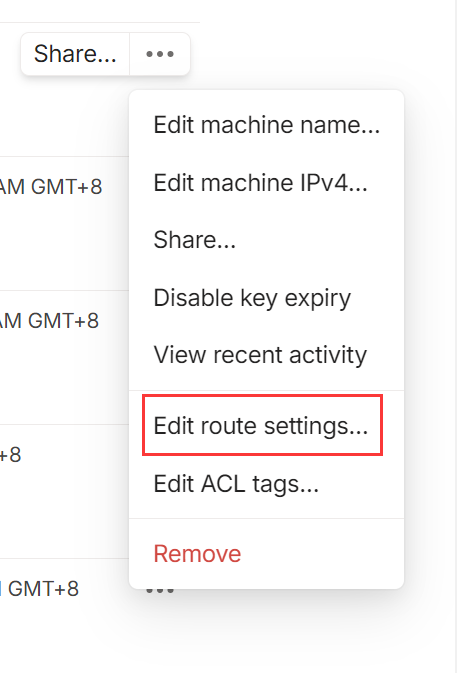
3.1 选择“Edit route settings”
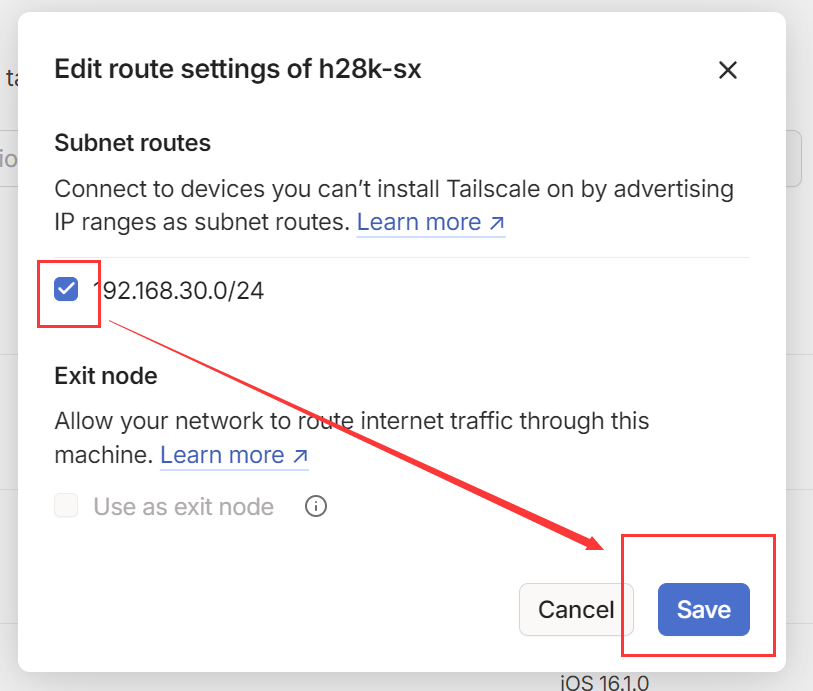
在“192.168.30.0/24”(第8个步骤命令中你写的网段是什么,这里就显示什么)打勾,再点“Save”;
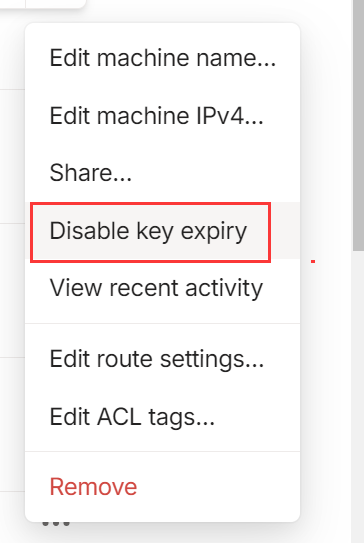
2.2 选择“Disable key expiry”,设置该设备的密钥为永不过期
升级版本
由于软件包中的版本更新不及时过低,可能需要手动升级版本
- 下载最新文件,并解压 地址: https://github.com/CH3NGYZ/tailscale-openwrt/releases
地址: https://pkgs.tailscale.com/stable/#static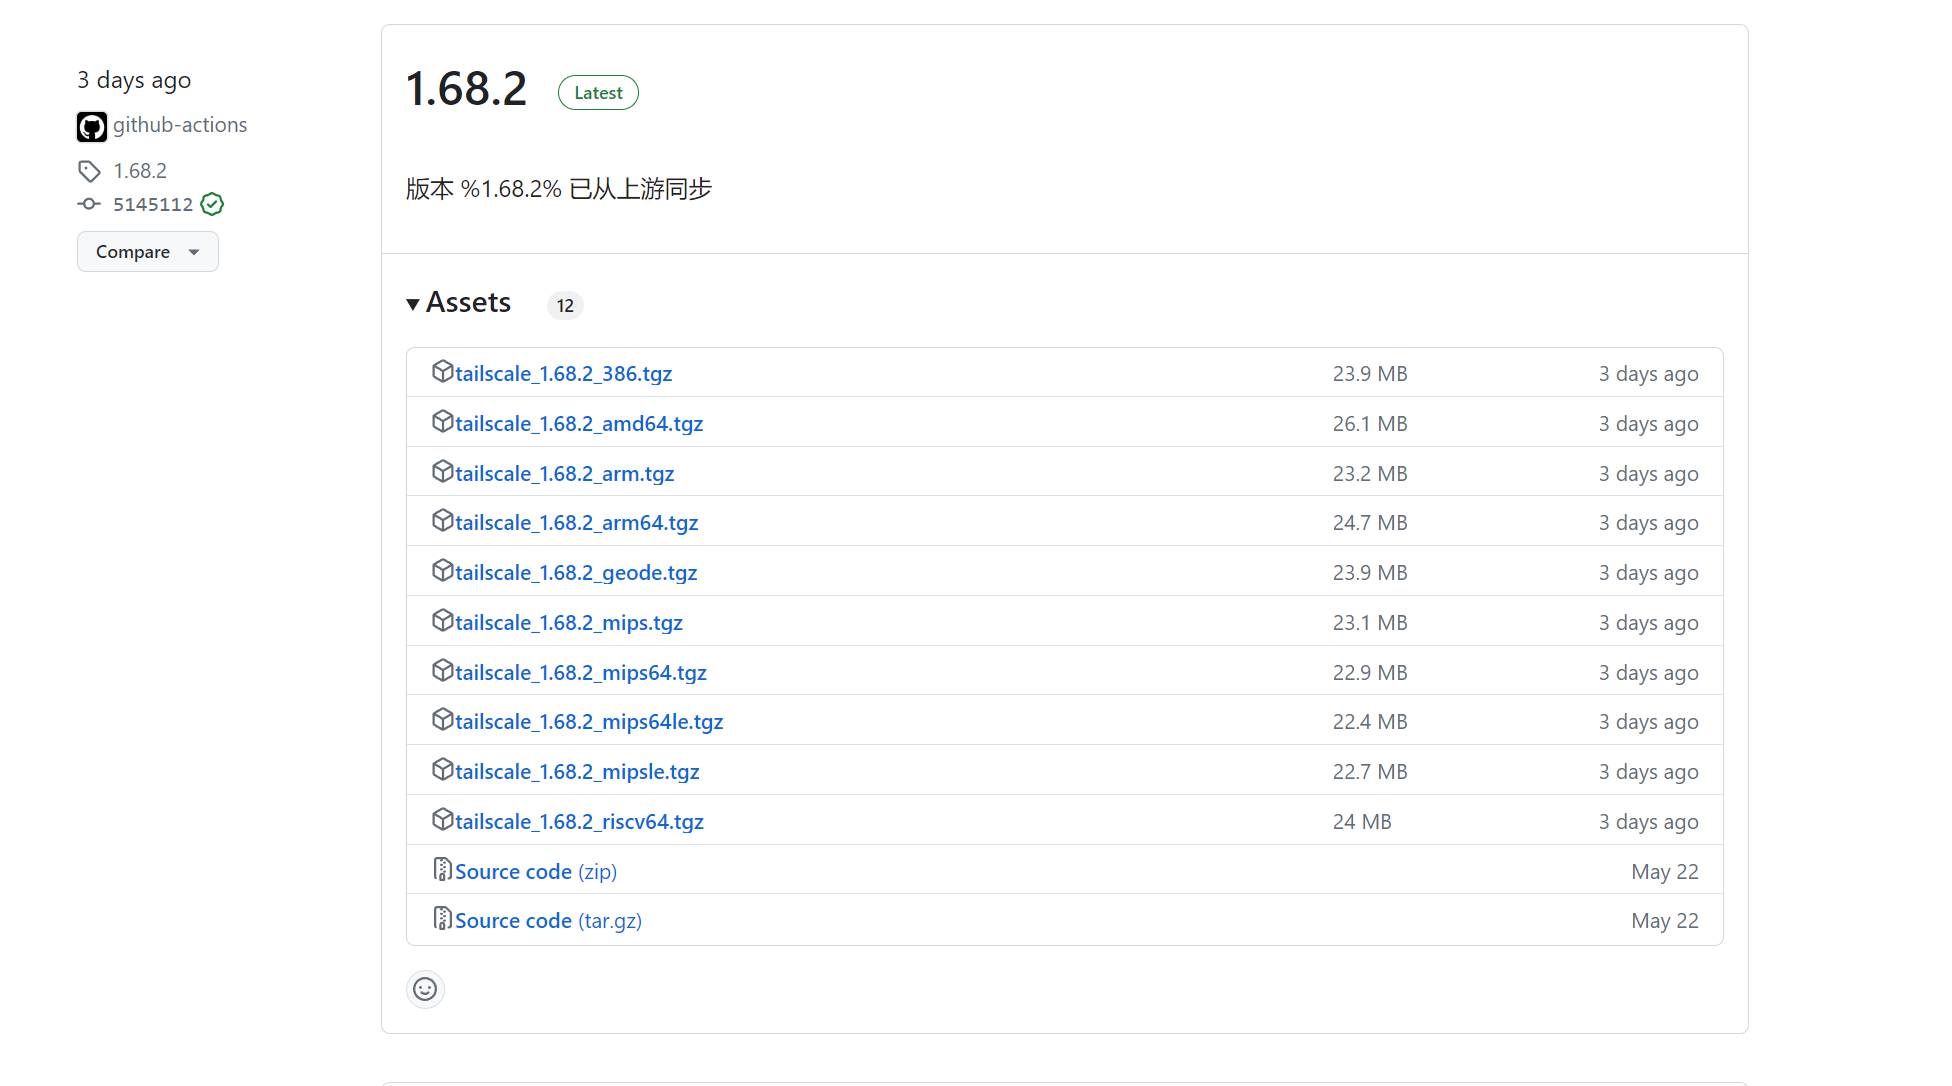
- 系统=>文件传输=>上传

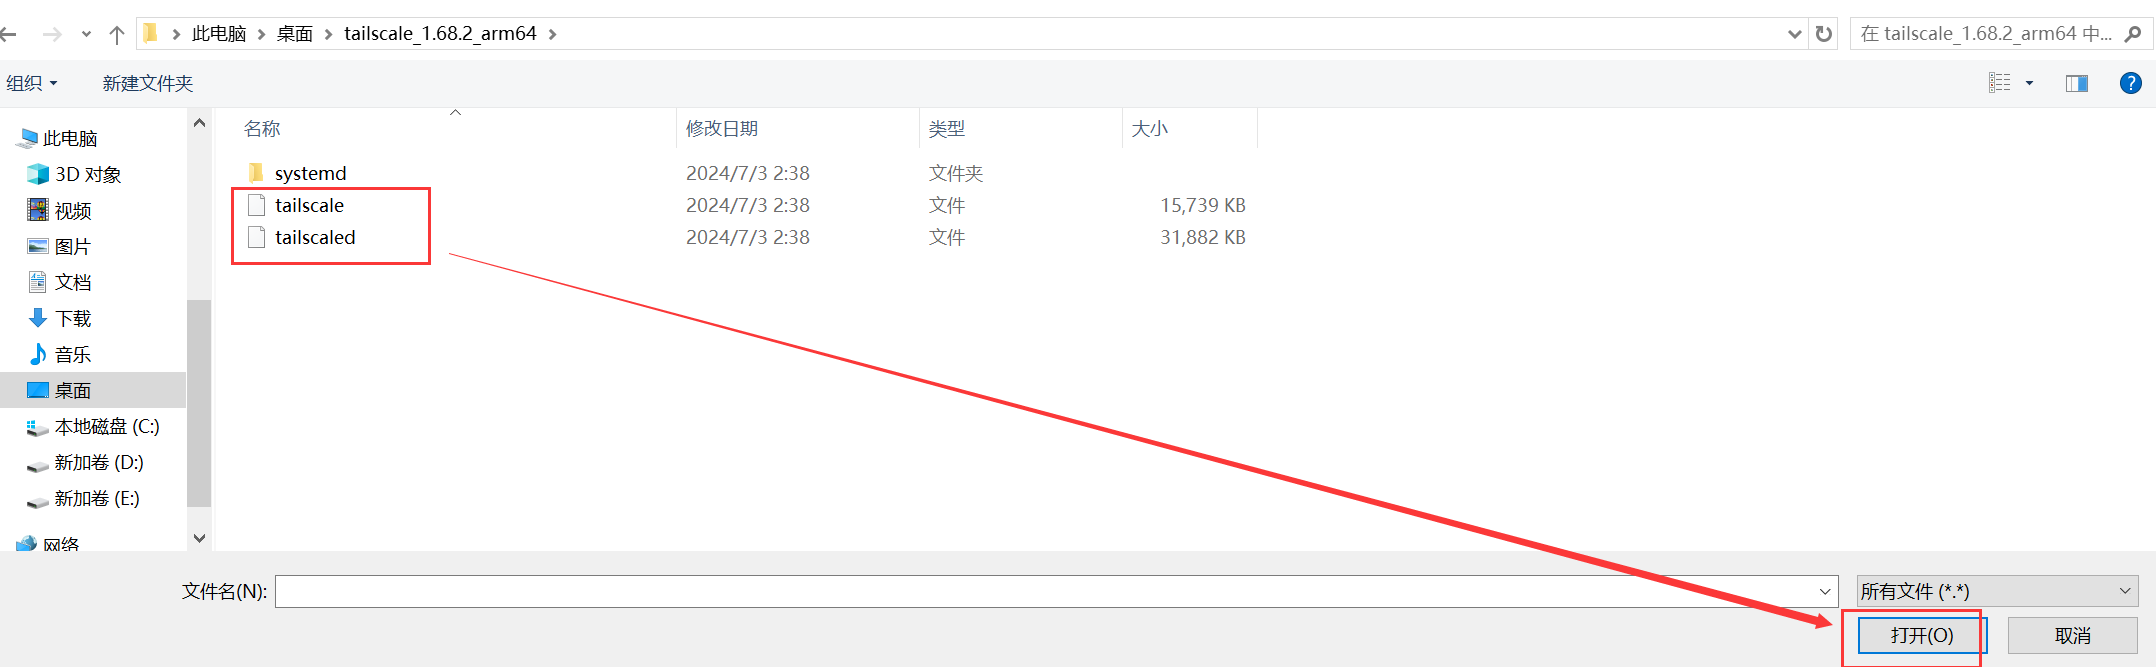
- 进入命令行终端,执行命令
1
2
3
4
5
mv /tmp/upload/tailscaled /usr/sbin/
mv /tmp/upload/tailscale /usr/sbin/
chmod +x /usr/sbin/tailscaled
chmod +x /usr/sbin/tailscale
/etc/init.d/tailscale restart - 到控制台界面查看版本

卸载
在软件包中点击卸载后,需要到删除残余文件
1 | rm -rf /etc/tailscale/ |
其他功能
1.Tailscale开机自动启动
1 | /etc/init.d/tailscale enable |
2.防火墙问题
如果安装完毕后,然后无法使用tailscale访问,可以把以下三行内容复制,网络=>防火墙=>自定义规则,处粘贴,再点一下“重启防火墙”
1 | iptables -I FORWARD -i tailscale0 -j ACCEPT |

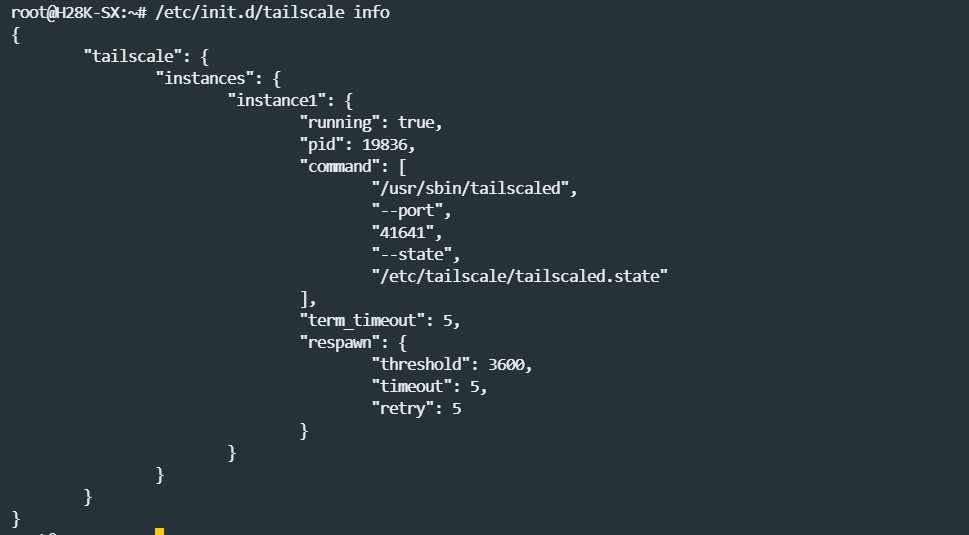
3.查看tailscale的启动命令
1 | /etc/init.d/tailscale info |
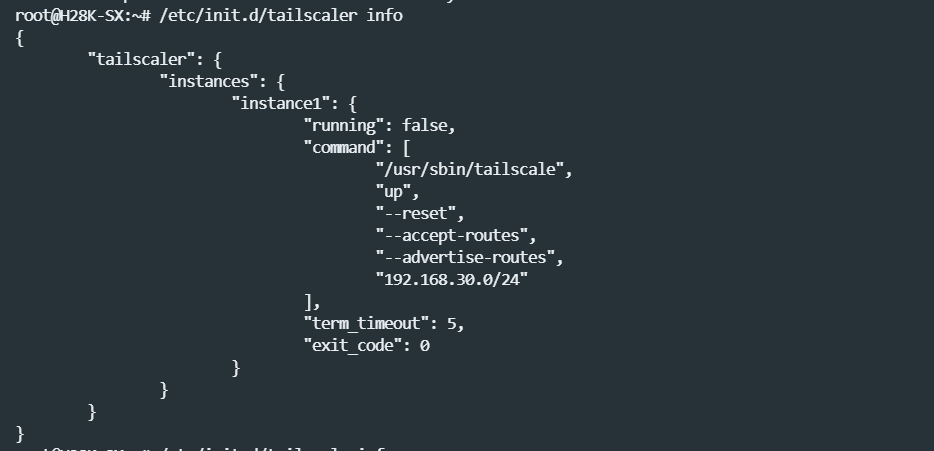
4./etc/init.d/启动配置说明
/etc/init.d/tailscale1
2
3
4
5
6
7
8
9
10
11
12
13
14
15
16
17
18
19
20
21
22
23
24
25
26
27
28
29
30
31
32
33
34
35
36
37
38
39
40
41
42
43
44
45
46
47
48
49
50
51
52
53
54
55
56
# Copyright 2020 Google LLC.
# Copyright (C) 2021 CZ.NIC z.s.p.o. (https://www.nic.cz/)
# SPDX-License-Identifier: Apache-2.0
USE_PROCD=1
START=80
start_service() {
# Tailscale 状态文件的路径
local state_file
# Tailscale 服务监听的端口号
local port
# Tailscale 服务的标准错误输出和标准输出的日志记录
local std_err std_out
# 加载"/etc/config/"目录下,名为 "tailscale" 的配置文件
config_load tailscale
# 设置log_stdout的内容,从tailscale配置文件中
config_get_bool std_out "settings" log_stdout 1
# 设置log_stderr的内容,从tailscale配置文件中
config_get_bool std_err "settings" log_stderr 1
# 设置port的端口号,从tailscale配置文件中
config_get port "settings" port 41641
# 设置state_file的文件路径,从tailscale配置文件中
config_get state_file "settings" state_file /etc/tailscale/tailscaled.state
# 清理 Tailscale 的状态
/usr/sbin/tailscaled --cleanup
# 打开一个新的进程实例
procd_open_instance
# 进程实例的参数
procd_set_param command /usr/sbin/tailscaled
# Set the port to listen on for incoming VPN packets.
# Remote nodes will automatically be informed about the new port number,
# but you might want to configure this in order to set external firewall
# settings.
# 向进程命令参数列表中追加参数 端口号
procd_append_param command --port "$port"
# 向进程命令参数列表中追加参数 文件的路径
procd_append_param command --state "$state_file"
procd_set_param respawn
procd_set_param stdout "$std_out"
procd_set_param stderr "$std_err"
# 关闭进程实例,完成服务的启动配置
procd_close_instance
}
stop_service() {
/usr/sbin/tailscaled --cleanup
}/etc/init.d/tailscaler
1 |
|
5.Tailscale部分命令说明
路由表
--advertise-routes: 宣告路由表
将本路由器lan网段,如192.168.50.0/24,宣告给tailnet,如果其它tailscale客户端接受了此路由表,那么其它客户端可以通过192.168.50.0/24内的ip地址访问本路由器和路由器下的客户端。
--accept-routes: 接受路由表
在同一个tailnet网络下,如有其它tailscale客户端宣告了自己的路由表,可以通过此开关选择是否接受此路由表,如果接受,怎可以通过宣告的网段访问到网段内的设备。
-——————————————————————————————————————
- 情形1: 假如你此路由器在A地,lan网段为
192.168.50.0/24,lan网段里包含:路由器本身:192.168.50.1,一台电脑PC-1:192.168.50.23,一台NAS:192.168.50.55,此时打开宣告路由表:(--advertise-routes)开关,则此网段信息:192.168.50.0/24就会被告知到tailnet(tailscale局域网)。 此时如果你有一台电脑PC-2在B地运行了tailscale客户端,且该电脑的自己的网卡ip不是192.168.50.x,且tailscale设置了接受路由表:(--accept-routes),那么此时在B地的PC-2上,可以直接通过192.168.50.1访问到A地的路由器;直接通过192.168.50.23访问到A地的PC-1;直接通过192.168.50.55访问到A地的NAS - 情形2: 当然在B地的也可以是一台运行了
tailscale的路由器,该路由器的lan网段需要与A地的路由器不同,且tailscale设置了接受路由表:(--accept-routes),那么此时在B地路由器下的所有设备,都能访问A地网段下的所有设备了! 同理,如果需要A地路由器下的所有设备能访问B地路由器下的所有设备,那么需要:1. B地路由器上运行的tailscale设置了宣告路由表,2. A地路由器上运行的tailscale设置了接受路由表 - 注意1:
- 如果不开启宣告路由表,则其它
tailscale客户端只能通过tailscale提供的ip地址来访问此路由器! - 即使在客户端处开启了宣告路由表,还需要在后台(
admin console)的Edit route settings处确认开启才能生效! - 如果你在有多个客户端需要开启宣告路由表,请一定保证每个路由表都是不同网段,不然会导致路由表冲突使得设备无法登陆后台且无法上网!
- 当然你也可以将宣告路由表功能保持开启,如遇到冲突,可以在控制台不允许该路由表即可!
- 如果你的上级路由开启了
tailscale且宣告了路由表,下级路由器运行tailscale请不要接受路由表,不然也会出现路由表冲突导致无法上网! - 如果你开启插件后发现无法上网了,请关闭接受路由表选项!
- 如果不开启宣告路由表,则其它
本博客所有文章除特别声明外,均采用 CC BY-NC-SA 4.0 许可协议。转载请注明来源 Chc的技术分享!